Difference between revisions of "Mombasa Streets"
Wingman953 (talk | contribs) |
Wingman953 (talk | contribs) |
||
| Line 15: | Line 15: | ||
==Easy Streets Carryover== | ==Easy Streets Carryover== | ||
(Roughly what this WR does https://www.youtube.com/watch?v=7B_FES8hqOI) | (Roughly what this WR does https://www.youtube.com/watch?v=7B_FES8hqOI) | ||
| + | |||
- Use nades in PtD for clears and for speed. Empty SMG/Automag for fresh loadout. | - Use nades in PtD for clears and for speed. Empty SMG/Automag for fresh loadout. | ||
| + | |||
- Use nades in MS1 for speed, hope the 1st two grunts give you at least one Plasma Pistol to try and get a beserking brute. (Haven't seen a good way to get a beserking brute by using a needler). Empty SMG/Automag for fresh loadout. | - Use nades in MS1 for speed, hope the 1st two grunts give you at least one Plasma Pistol to try and get a beserking brute. (Haven't seen a good way to get a beserking brute by using a needler). Empty SMG/Automag for fresh loadout. | ||
- Use nades in MS2 for speed (I think if grunt on middle turret has a Plasma Pistol you can try grabbing it to get a beserking brute in that area). Empty SMG/Automag for fresh loadout. | - Use nades in MS2 for speed (I think if grunt on middle turret has a Plasma Pistol you can try grabbing it to get a beserking brute in that area). Empty SMG/Automag for fresh loadout. | ||
Revision as of 12:00, 14 January 2021
Beginner Goals:
n/a
Intermediate Goals:
{{{time2}}}
World Class Goals:
{{{time3}}}
IL Records:
{{{time4}}}
Segmented Times:
{{{time5}}}
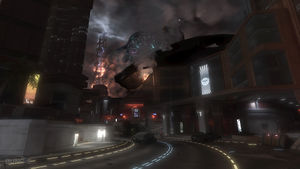
Mombasa Streets is the hub world in Halo 3: ODST. See Halopedia for general information.
The full rough path for Mombasa Streets on easy can be found in the link below. https://www.youtube.com/watch?v=D26t2cFEdwo&feature=youtu.be
Full Game Mombasa Streets Routing
Easy Streets Carryover
(Roughly what this WR does https://www.youtube.com/watch?v=7B_FES8hqOI)
- Use nades in PtD for clears and for speed. Empty SMG/Automag for fresh loadout.
- Use nades in MS1 for speed, hope the 1st two grunts give you at least one Plasma Pistol to try and get a beserking brute. (Haven't seen a good way to get a beserking brute by using a needler). Empty SMG/Automag for fresh loadout. - Use nades in MS2 for speed (I think if grunt on middle turret has a Plasma Pistol you can try grabbing it to get a beserking brute in that area). Empty SMG/Automag for fresh loadout. - Use nades in MS3 to get to the gauss turret, try and pick up nades at the end so you have at least 2. Don't empty SMG/Automag. - Use 1 frag in MS4 for a slide boost at the start. Don't empty SMG/Automag. - No nades usage in MS5, just drive. Don't empty SMG/Automag. - No nade usage in MS6, just drive. Don't empty SMG/Automag. - Enter DH with 1 frag and collect 2 more right at the start.
Legendary Streets Carryover
Optimally it would be best to do the easy route above but MS2 can be a bit tough with that route. Alternative strats for the above include:
- If you get a Plasma Pistol drop from the 1st two grunts, use 2 frags in MS2 for speed. Don't empty SMG/Automag. - In MS2 don't grab sniper and go straight through the mission with double pistol, 1 frag and maybe some lucky plasmas. Collect frags by the goose, keep them and don't empty SMG/Automag or use them for combat and do empty Sniper/Automag (either way doesn't matter too much if you walk up the stairs in MS3 and then collect nades by the gauss turret.)
OR (what WR does here https://www.youtube.com/watch?v=X-B4ahV3NxM)
- With a fresh loadout in MS2, grab sniper and frags (use 1-2 frags to get to the goose cache quickly). Grab frags in goose cache, keep them and don't empty Sniper/Automag or use them for combat and do empty Sniper/Automag (either way doesn't matter too much if you walk up the stairs in MS3 and then collect nades by the gauss turret.)
