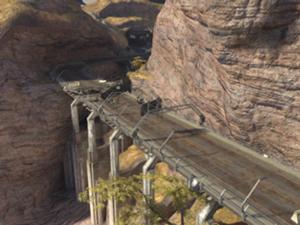
Tsavo Highway
Beginner Goals:
Easy: ~3:30; Legendary: ~4:00
Intermediate Goals:
{{{time2}}}
World Class Goals:
{{{time3}}}
IL Records:
{{{time4}}}
Segmented Times:
{{{time5}}}
Tsavo Highway is the third playable level in Halo 3. See Tsavo Highway (Halo Nation) for general information.
This level has a Video tutorial for Legendary with beginner strats here if you're just looking to learn the level.
Click here to go to a table which shows the WR times and video links for this level on both Easy and Legendary.
Version Differences
This level is essentially identical, with the main difference being that driving physics differ slightly between MCC and OG.
Easy
First open the door and then get the warthog, then you just drive until you get to the bridge section, where you drive up the hill that's right next to the bridge, and then when you get to barrier, you can optionally get a grav lift in the huts to make the bridge jump easier. You just drive up to the barrier, throw a nade at it, and then make your way to the bridge.
Bridge Jump: So there are multiple ways of doing this jump, the fastest way is to just squeeze your warthog inbetween the concrete barriers, but the more safe approach is to get a grav lift and use that to just fly over the concrete barriers.
After that you just keep driving until you get to the section with the 2 brutes and the 2 choppers, you get one of the choppers, drive to the left until you get under the road, and then drive up the hill on the left, drive to the ending section, kill the shade, and destroy the barrier to end the level.
Sidenote: There is a hill which is referenced above, it has to be landed in a specific spot, the wraiths will try to shoot you so be careful.
Legendary
If going for the IL record on Legendary, this level has to be played using the same strats as on easy, just praying that nothing will kill you. The Legendary route given below is for consistency and better for fullgames.
At the beginning of the level, make sure you get two marines in your warthog (One gunner and one side-seat) before leaving, because these marines will soak damage and make surviving the following sections much easier. Upon getting to the "bridge section" mentioned in the easy section above, the path you take through the centre of the area is important; if you attempt to go straight for the hill beside the bridge, you leave yourself too open to the sniper fire from the sniper nest on the left side of the area and you will likely get shot. Thus, make sure your route curves a little as you head through the water on the valley floor.
At the barrier section, make sure to grab a grav lift from the far building, then drive towards the barrier. At this point check the position of the turret by the plasma barrier, it will either be on the left or right side of the barrier. If the Turret is on the right side of the barrier, simply drive the regular easy route, get out and shelter behind the barrier for shields, then melee the barrier generator and carry on. If the turret is on the left side, you can just drive straight into the turret and splatter it, then get out, go behind the barrier and kill it and get back in the hog and drive away. Alternatively, if this seems too hard, you can try being very fast and going right around the sniper tower and booking it behind the barrier. This method leaves you open to direct fire from the turret, but works if you move very quickly.
Do the bridge jump either with the gravity lift or by squeezing your warthog between the concrete barriers, then drive through the next battleground by going through the pipes on the right hand side of the valley, and make your way to the wraith and two choppers. It is easiest here to go around the left hand side of this area and then navigate your way through the debris on the far side of the valley to avoid the chopper shots and wraith shots. You have to be careful however because the hitboxes of the debris do not line up with the models for the debris.
In the next area, kill both brutes and pick up the fuel rod gun. Grab a chopper and head towards the underside of the bridge, instead of the rock you normally ride up on easy. Go up the slope on the left of the bridge and make your way towards the brute barrier. Get out before you reach the very end of the level and fire off fuel rod shots at the Turret and at the plasma barrier, then jump off the right side of the highway and walk along the cliff towards the barrier until you get closer, at which point you can jump back up under the truck and crouch walk towards the barrier in order to end the level.
