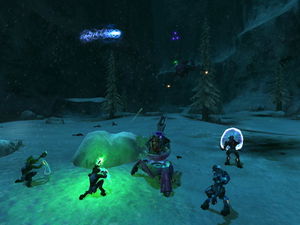
Two Betrayals
Beginner Goals:
x:xx
Intermediate Goals:
{{{time2}}}
World Class Goals:
{{{time3}}}
IL Records:
{{{time4}}}
Segmented Times:
{{{time5}}}
Two Betrayals (often abbreviated TB) is the eighth campaign level in Halo: Combat Evolved. See Halopedia for general information.
Halo Runs record page: http://www.haloruns.com/records?lb=108 (click the timestamps for video links)
Contents
Video Examples
Examples of every trick mentioned here can be found on either the Individual Records page or Full Game Records page.
Control Room
There are 4 Sentinels that immediately engage you after you skip the cutscene. You can ignore them on Easy.
On legendary
Hide behind the thin glass to your right, fire a charged shot at each Sentinel. You can also aggro them without seeking cover. If you want to preserve PP battery, which could make subsequent fighting more easier, fire a charged shot at only 2 Sentinels and plasma pepper the others.
Control Room Hall
On legendary
Generally best to hang back and let the Sentinels and Covies fight each other. Keep in mind if most of the Grunts die, there will be an Elite and two Jackal reinforcements spawning in the back of the room. Kill some of the Sentinels and prioritize the very first Elite to prevent this.
Control Room Entrance
On easy
Get to the bottom of the ziggurat as quickly as you can and take Banshee.
On legendary
Two Elites typically spawn to the right after opening the door, throw a plasma at their location without being detected. Throw a frag to clear the rest of the outside enemies. Try to kill them as soon as possible.
Head to the right side of the ziggurat, toss a plasma at the patrolling Elite, toss a couple more plasmas at the 2 Elites below. Drop down onto the snow and hug the wall to the right. Get close to the Wraith without being detected and shotgun it. The Wraith can still hit you in close range so stay very close to it. Take the Banshee afterward.
First Tough Room
On easy
Nade jump up to the ledge.
On legendary
Break glass window to the left, alert enemies and toss plasma to draw them away, frag jump up to ledge, rocket Grunts below, frag/rocket Jackals. Toss a plasma or two across the hall to kill the 2 Elites.
Second Tough Room
On legendary
Hide and wait for Flood to engage Covies, throw frag through the gap in the wall to draw out Elites and kill Grunts, fire rockets.
Covie Bridge
Yolo?
Hell Room
On legendary
Plasma nade the AR Flood, frag the shotgun Flood, toss a plasma where the 2 Elites spawn but don't trigger them until the nade is about to explode. Wait for a bit so the other Flood in the room to retreat then make your way to the next hall. Frag the Flood there and try to get a CP before engaging the lone rocket Flood. Just run through the next room, use an explosive behind you to kill the Infection form spawns and pursuing Flood. If you don't get the CP, simply backtrack and hit the lz again and you might get it.
Flood Bridge
Yolo?
Ground Floor
Fire rocket to flip Ghost upright, drive to Banshee. On your way there, get the health pack and ammo if needed, at the bottom of the spiral path area near the overturned Hog. Take the Banshee to the second pulse generator.
Second PG (Pulse Generator)
Chuck frags, fire rockets, shotgun Flood, get CP. Disable generator, chuck nades, fire rockets at reinforcement Flood.
Tunnels
Pray.
