Difference between revisions of "Sierra 117"
| Line 9: | Line 9: | ||
}} | }} | ||
| − | '''Sierra 117''' is the first playable level in [[Halo 3]]. See [ | + | '''Sierra 117''' is the first playable level in [[Halo 3]]. See [http://halo.wikia.com/wiki/Sierra_117_(level) Sierra 117 (Halo Nation)] for general information. |
A video tutorial for this level can be found here: [https://youtu.be/CBPHCg8F67s Sierra 117 Legendary Tutorial by TheBlazeJP] | A video tutorial for this level can be found here: [https://youtu.be/CBPHCg8F67s Sierra 117 Legendary Tutorial by TheBlazeJP] | ||
Revision as of 20:20, 20 October 2018
Beginner Goals:
Easy: ~5:30; Legendary: ~7:00
Intermediate Goals:
{{{time2}}}
World Class Goals:
{{{time3}}}
IL Records:
{{{time4}}}
Segmented Times:
{{{time5}}}
Sierra 117 is the first playable level in Halo 3. See Sierra 117 (Halo Nation) for general information.
A video tutorial for this level can be found here: Sierra 117 Legendary Tutorial by TheBlazeJP
Contents
Version Differences
On both Easy and Legendary, the most noticeable difference between the Original Game and MCC is that the early pelican board at the end of the level is slightly easier on MCC, due to increased knockback from the hammer/nade combo jump.
Easy
Walk It Off
The first minute or so of Sierra 117 is mainly focused on optimized movement with very little to no noteworthy things. Move from point A to point B as fast as possible by hugging walls when making turns, jumping over obstacles, and making use of sloped surfaces for slide jumps.
Pipe Area
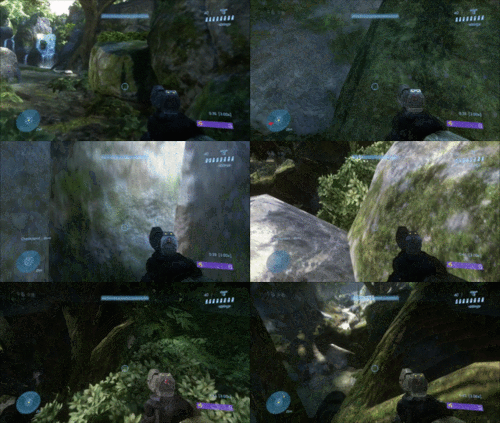
In the area with the sleeping grunts, there are a few ways out. The most difficult, but the fastest way is to follow the cliff-face along the right hand side of the area. You can ramp the log on a rock there to get on a standable part of the rock wall, and then long jump straight to the exit of that area. Currently the Individual Level World Record (or IL WR) does this. [1] [2]
The second fastest method, which is a lot easier, would be to just jump up from the pipe. [3]
If you're finding the pipe jump difficult, you can use one of the crates just left of the pipe.
Entering Cortana Skip
Once you're past that area, you'll want to do the Cortana skip. The skip itself is easy. The hardest part is the first jump of the skip. Jumping from the sloped part that sticks out the rock down below can be difficult. If you let go of forwards in mid-air for a second, you wont hit your head on the overhang. Do not hold crouch on landing. If you play "the floor is lava", you wont trigger the moment. [4] Here is a fairly detailed explanation of the skip: [5]
Charlie Foxtrot
As you're going through the river area, grab a Brute Shot from the final Brute. Use either a Plasma Pistol or Needler to quickly kill the Brute and grab the Brute Shot. [6]
Jackal Sniper Forest
As you're going through the sniper forest, you can do a cone launch [7]
Chasm Jump
Once you're past the sniper forest, you'll want to do the gap jump. There are many ways to do this jump. Here's a clear detailed description for the gap jump with a Frag Grenade: [8]
You can do the jump with a Brute Shot, which is one of the most common ways on Easy: [9]
You can do the jump with a Frag Grenade, which is also a common method: [10]
You can do the jump with a Plasma Grenade: [11]
You can do the jump with no explosion whatsoever, which is quite a bit harder: [12]
There are a few backup strats you can do, such as dropping down and Brute Shot jumping up from the ground. [13] [14]
Quid Quo Pro
Your objective upon reaching this area is to release Johnson from the prison on the far side of the dam. Once the cutscene ends, jump down and make your way towards the lower level of the building to your right. As you approach the building, there is a cylindrical object towards your left. You can jump onto this. On the wall of the building is a ledge upon which you can stand and walk. Jump onto this and move towards the bridge. Assuming your movement has been decent, there are enemies dropping out of a Phantom. Dispatch these enemies quickly and move towards the prison. To your left is another ledge, similar to the one on the other building. You can jump onto this ledge and make your way to the prison or take a less risky route by moving further ahead and then dropping down in the building interior. Once you reach the prison, you can use a Brute Shot or grenade to propel yourself to the roof and break in through the glass or jump on the window shudders and reach the roof.
After releasing Johnson, kill the Chieftain for his Gravity Hammer and equipment. The equipment dropped will either be a Flare or an Invincibility, but save them if you plan on performing the Early Pelican trick. Your objective now is to clear as many enemies as you can to trigger the Pelican to pick you up and to end the level. Exit the prison and make your way back to the bridge. Use your Hammer and Battle Rifle to clear out as many enemies as possible. Once on the Bridge, another Phantom will be dropping off reinforcements; kill them with Plasma Grenades and Hammer Swings, but be careful if you use Grenades. Make your way across the Bridge and kill the last group of enemies.
At this point, the Pelican should be spawning soon. You will need to cross back to the Prison if you wish to do Early Pelican. To do so, there is a broken bridge. If you have an Invincibility, you will want to use it to Grenade Jump with a Plasma Grenade. This will allow you to make it back to the prison and to be in position to do the Early Pelican.
Early Pelican is one of the harder tricks in the speedrun, which isn't recommended for beginners. You can just wait for the Pelican to fly to its normal spot then end the level, but this forsakes the opportunity of saving potentially 20 seconds. To learn how to perform the Early Pelican trick, see the "Early Pelican" section further down the page for more detail.
Legendary
Walk it Off
Like on Easy, the first 40 seconds of the level until you approach the first fight is solely optimized movement. If a Marine gets in your way, you can kill him with a headshot with your Pistol. If you do this, you may receive Frag Grenades, which will help later.
First Fight
As you approach the first fight, you can either run past all enemies or skip it almost entirely. As you approach the waterfall, there is a rock to your right. Jump on top of the rock and look for a point where the rock walls make a corner. Ghost-jump into the corner and spam-jump to get on top of the rock wall. However, do not immediately jump down as you will hit the loading trigger for enemies. Instead, jump towards the right, move forward, and then jump on top of a tree branch as you fall down. This will properly skip the majority of enemies in this area, but there are still some Grunts in the area. Move forward towards a group of Grunts and kill them for a Plasma Pistol and possibly some grenades. Make your way out of the area now. [15].
Alternatively, you can attempt to run past all enemies to save 3-5 seconds. Stay towards the left hand side of the area, and try to avoid getting shot by Grunts. As you evade two Grunts shooting you, a third Grunt should be standing under a tree; kill him for his Plasma Pistol and possibly a Plasma Grenade. A Phantom will be deploying reinforcements; try to avoid the shots from the Grunt on the Turret. If your shields are depleted, you can stand under the tail of the Phantom momentarily and let your shields recharge and move along. As you approach the cave to exit the area, a Brute Captain with a Brute Shot will approach the cave. Use the Noob Combo (Plasma Pistol overcharge + Headshot) to take him out and to prevent him from killing you as you exit.[16] [17]
Jackal Carbine Area
Once you come to the sleeping grunts area. You'll want to assess the situation really fast. It's entirely possible to just run through this area without worrying about anything, but it's hard. You'll want to switch your pistol our for a Carbine, so you now have a Carbine and a Plasma Pistol. Your first focus should be on killing only three carbine Jackals in the trees. If you kill four, you'll have more enemies spawn by the exit. Focus on the rightmost Jackals and kill them, and make sure to kill the Jackal by the exit to the area. If you don't kill the Jackal by the exit, you wont get a checkpoint as you enter the next area. Kill a few Grunts around the pipe, just to help survive. You can leave this area using the same methods on Easy, however you'll die a lot faster. The recommended ways are to use the pipe jump up, or the supply crates just left of the pipe. [18] [19] [20]
For the next area, the area with the Brute holding the Marine on the log. You'll want to just crouch jump up the right hand side cliff-face and skip that first fight. [21] If you can't quite make the jump up, you can jump on the rock just before then jump up. Kill the carbine Jackal that approaches you. Take out your plasma pistol and begin to charge. Fire it at the Brute in the cave and kill him. Feel free to throw any grenades you have at this part, to clear out some enemies. Sometimes the Grunts here go kamikaze and will try to kill you, so be careful. [22]. You can grab the Brute Shot from this Brute here if you like, it helps for a faster Cortana skip. Also sometimes he drops a Bubble Shield which you should hold on to if you can.
Now we come to the Cortana skip, which is the same as Easy. Here's how to do it with a Brute Shot: [23]. It's basically a slide jump with a brute shot explosion to further the distance you go. Here's a detailed explanation of the skip: [24]
As you arrive at the river pick up a BR, either switch it out for the Brute Shot or Plasma Pistol, depending on your current weapons. You'll want to have either a BR and a Plasma Pistol, or a BR and a Carbine at this point. You'll want to head down to the first group of enemies. Punch the Brute in the back, if he drops a Bubble Shield and you didn't get one earlier that's good. If he doesn't, it isn't a huge deal. Punch the enemy that's sitting on the turret (if there is one) and you'll grab extra BR ammo. Jump into the water and kill the two Beam Rifle snipers on the far side. You'll want to head towards the exit of the area, while remaining in the water. There are two ways out of the water. You can use a grenade jump boost to get out, or just a jump which is slightly slower. [25]. Then enter the sniper forest.
There's no special strategy for the sniper forest, just learn the spawns and kill them all as you move through at a steady pace.
Gap jump is the same as on Easy. You'll want to kill some snipers as you approach though. Across the other side of where you are, there is a Beam Rifle Sniper that sometimes spawns, if he does, you'll want to kill it. There's also two on a ledge to your left. Focus on those three, then do your preferred gap jump method. You'll want to learn the gap jump on Legendary, because the backup strats are pretty hard. They take a lot of time. If you have a bubble shield at this point, deploy it mid gap jump. It'll save you from potentially being sniped. You don't need one, it just helps. If you want to be risky, you don't need to kill any snipers, you can just do the gap jump and run through the area.
Gap jumps: [26] [27] [28] [29] [30]
Chapter 2
Now we arrive at the end of the level. The idea here is the same as Easy, make it to Johnson's prison. However because we're on Legendary, we'll want to take a slightly safer route. The first thing you should do is see if the enemies are awake. If they're not, and the Jackal below you is facing away, you can drop straight down and make a run for under the bridge. If they aren't awake, but you feel the Jackal might spot you, or are they already awake. Follow the cliff face along to the right hand side, drop down and follow it all the way around. Pop out and make a dash for under the bridge again. As you're running under the bridge, you can jump to avoid beam rifle shots. [33] [34] Once you arrive at the other end of the dam, jump up on the crates and up to the right. Fall back into the back room straight ahead of you and follow that back room down all the way to the bottom. As you arrive at the bottom, be careful of a sniper on top of Johnson's prison. Release Johnson and you should start killing enemies. If you're near the Chieftain and Johnson at the same time, the Chieftain will focus on Johnson most of the time, leaving him open to assassination. There's a few ways to approach this fight. You can go back into the side room, and use those red engine things to grav hammer jump onto the roof and sit up there and be safe. But that's slow, the ideal way to deal with this fight is to just stay put behind Johnson's prison and kill all the enemies as they approach you. You can do Early Pelican as it arrives, but it's from the other side as Easy. Early Pelican is quite a bit easier from this side.
If the Chieftain drops a flare, you can just do a grenade jump then equipment jump into the Pelican using the flare. This is by far the easiest way to do the trick from this side. If he doesn't you can use a grenade and hammer boost into the Pelican. It's possible to get in with just the flare. Here are a few videos: [35] [36] [37]
Important Tricks
Cortana Skip
Chasm Jump
Early Pelican
Doing the Early Pelican requires a Frag Grenade and a Gravity Hammer or a Frag Grenade and a Flare. If you do not have a Frag Grenade, a Plasma Grenade will work, but it will be very easy to kill yourself due to the higher damage from Plasma Grenades, but an Invincibility can alleviate the problem.
At the end of Sierra 117, you will rescue Johnson from a prison. Exiting the prison, there are two wooden crates to the right near the edge as you exit. You will perform the Early Pelican trick near the far crate.
For the Frag + Flare method, stand on the edge of the platform face the are where the Pelican will come in. Listen for Foehammer to say "I see 'em; standby." Once you hear that, crouch, look directly down, and throw the grenade. Run forward and jump just before the the grenade explodes for a Grenade Jump, but continue looking down. At the apex of your jump, use the Flare and spam the Jump button to perform an Equipment Jump towards the Pelican. As you are moving towards the Pelican, look at the it and hold Action/Reload to board it.
The Frag + Gravity Hammer will require more practice as the technique to successfully use this method require more precision. Use the same positioning as before, but face the crate this time. Try to line yourself up with the right half of the crate to avoid missing the Pelican, and look down after lining up properly. As with before, listen to the dialogue to know when to execute the trick. After Foehammer says "I see 'em; standby," plant the Frag Grenade on the floor. Run backwards and jump the moment you notice a dip in your elevation. Time your hammer swing so that your Gravity Hammer activates simultaneously with the Frag Grenade explosion. The combined boost will be just enough to boost you to the Pelican. Make sure you turn around mid-air to receive the prompt to enter the Pelican.


